how to draw african savanna trees
Supplies Needed
- Shoebox or similar-sized box
- Construction paper or cardstock
- Crepe paper
- Acrylic paint
- Crayons or colored pencils
- Scissors
- White glue
- Paint brush
- Craft sticks
- Glue gun
STEPS

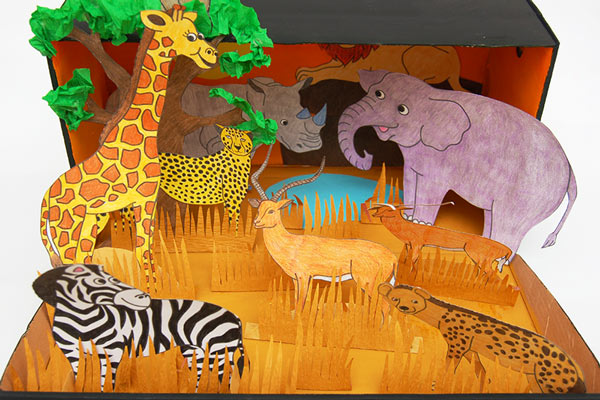
1Prepare the box.
Scout around for a shoebox or similar-sized box. A larger box gives you more space to work with and allows you to put in more details.
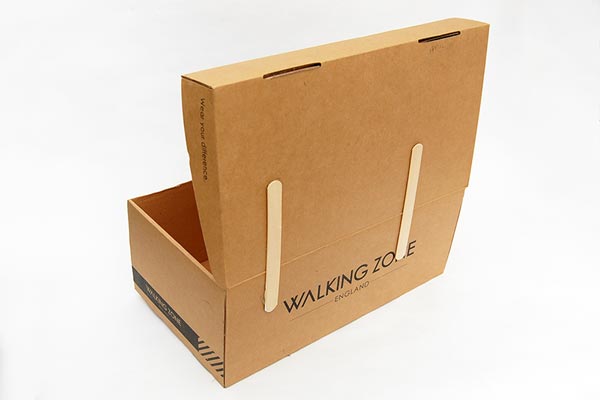
If you want to include the lid as part of your diorama, you will need to keep the lid permanently open by using a glue gun to attach craft sticks or any flat rigid material along the box's hinge.
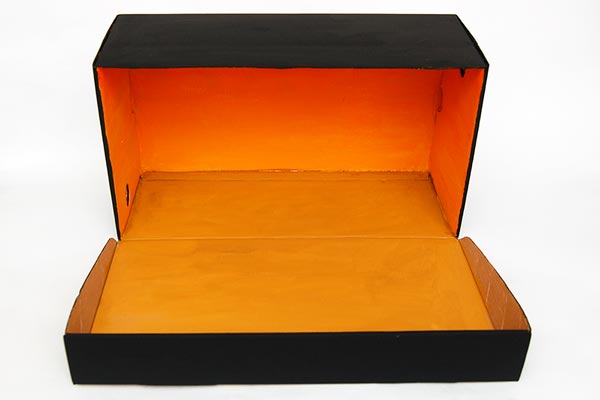
2Paint the box.
Use poster paint or acrylic paint to color the box. Acrylic paint is best used when your box has a glossy finish. Paint the inside walls with whatever color you want the sky to be—you can make it blue or color it yellow/orange for a sunset-filled sky. Paint the ground green for a wet season grassland or color it yellow ochre/light brown for a dry season savanna. Painting the outside of the box is optional.
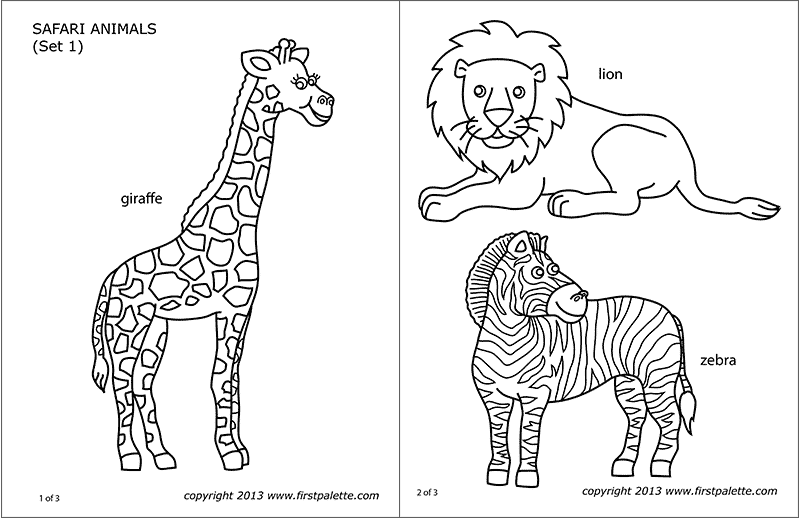
3Draw or print out the animals.
Draw the animals, cut them out from magazines, or print out online images. You can also print out these Safari or African Savanna Animals on A4 or Letter size cardstock.
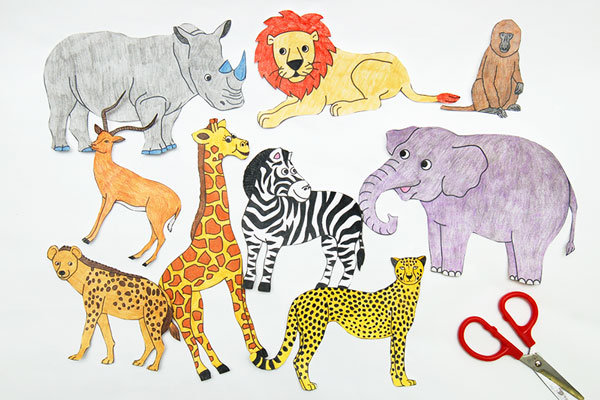
4Color and cut out the animals.
Color and cut out the animal print-outs or drawings. The paper animals should be able to stand up so use cardstock for printing them out or draw them on construction paper. Magazine animal cut-outs should be glued onto cardboard or any heavy paper to make them sturdier.
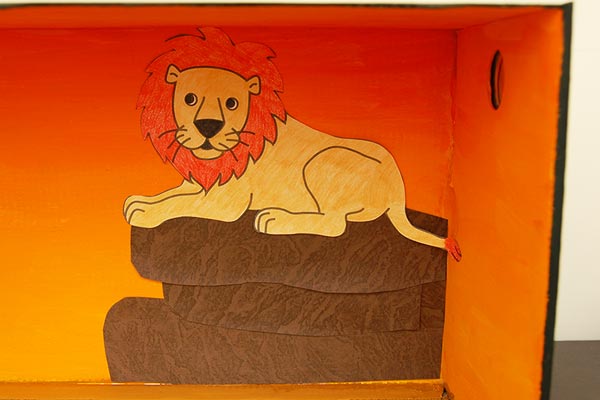
5Add background details.
Paint or glue some background details like clouds, a sun, a tree, or some animals. We've glued strips of brown construction paper to create a rocky outcrop for the lion to rest on. You can glue some of your animals onto the background.
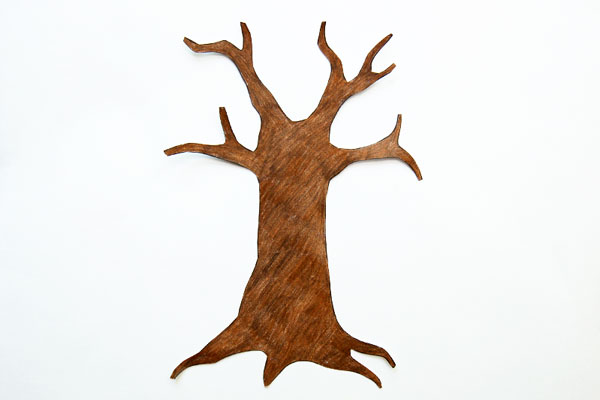
6Make a tree.
The African savanna is a grassland with widely-spaced trees. Some animals like baboons live in trees and animals like giraffes and elephants feed on their leaves.
Draw a tree trunk on brown cardstock. The tree must be about 2 to 3 inches taller than your box height. You can also print out this tree trunk template (choose either of the first two) on brown A4 or Letter size cardstock.
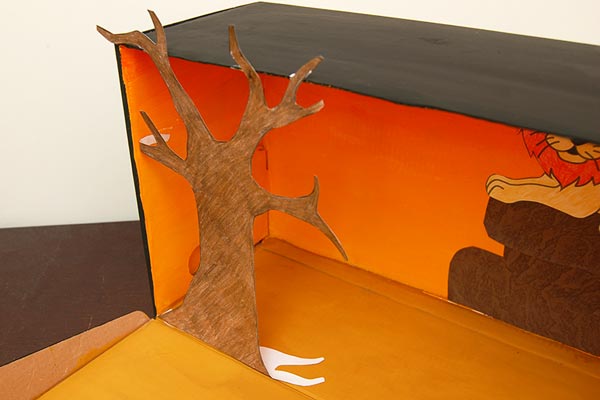
7Position the tree.
Create a bottom tab by folding the tree at the base. Make a side tab by folding an inch from the leftmost branch. Position the tree in the left corner of your diorama by gluing the side and bottom tabs onto the box. You can trim the excess length of branches on top. We prefer ours to jut out of the box.
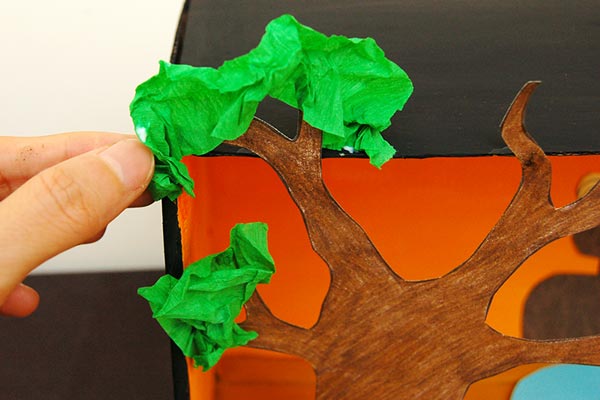
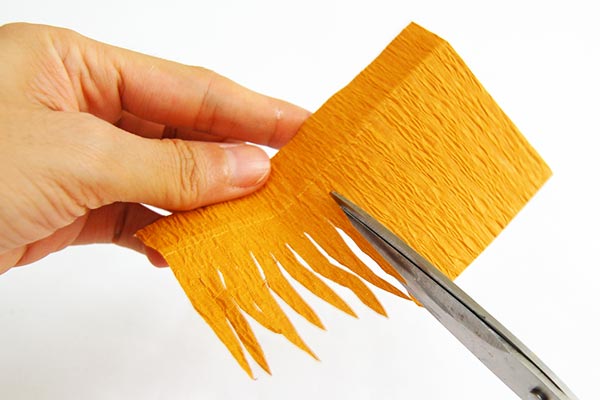
8Create leaves.
Cut green crepe paper into strips. Crumple them up slightly and glue them onto the branches and onto the edges of the box.
*If you are keen on making a three-dimensional tree instead of the flat one we made, you can head over to our 3D Paper Tree craft for instructions.
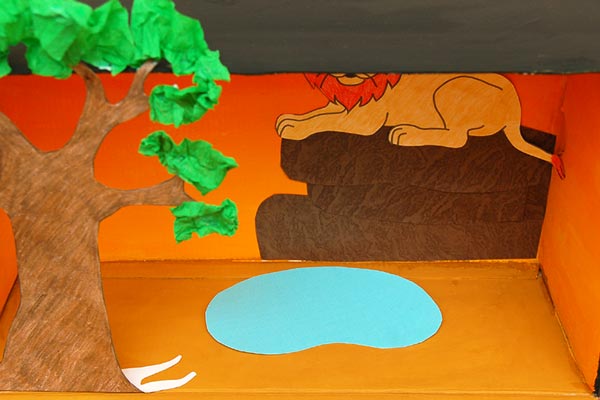
9Add ground features.
Glue some ground features like rocks or a watering hole. Make a watering hole by cutting out an oval shape from blue construction paper. Paint egg carton sections to create rocks or use real rocks.
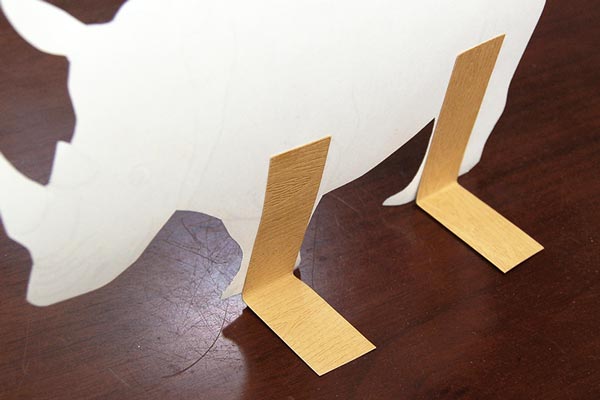
10Create paper tabs.
Adding tabs will allow you to glue an animal to your box diorama.
a.) L-tab - Fold a strip of thick cardstock into an L-shape. Glue behind the legs to make a bottom tab or behind the animal's backside to create a side tab.

b.) C-tab - Fold a small rectangular strip of paper on both ends to create a C-tab. This will allow you to attach an animal onto the front part of the box lid. Glue one end of the tab behind the animal's legs and the opposite end onto the inner face of the box lid.
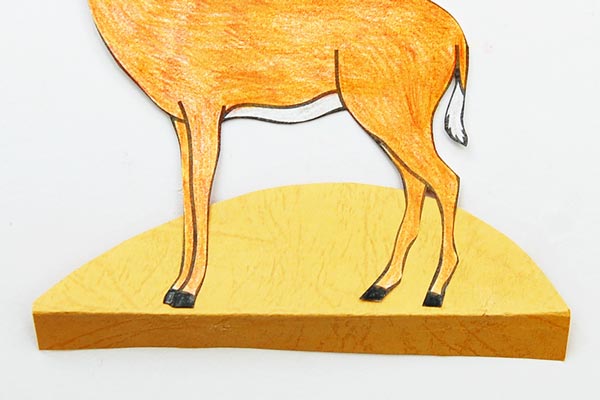
c.) Stand with bottom tab - Create a stand by cutting a hill shape out of construction paper. Glue the animal's legs about ½-inch from the base. Fold the stand right below the legs to create a bottom tab.
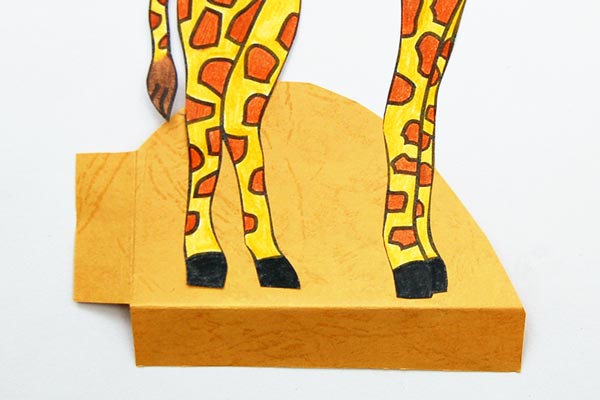
d.) Stand with bottom and side tab - Large or tall animals such as elephants and giraffes are best placed on the corners of your box diorama. Create a stand by cutting half of a hill shape. Include a side tab in addition to the bottom tab to be able to glue the stand to a corner spot on your diorama.
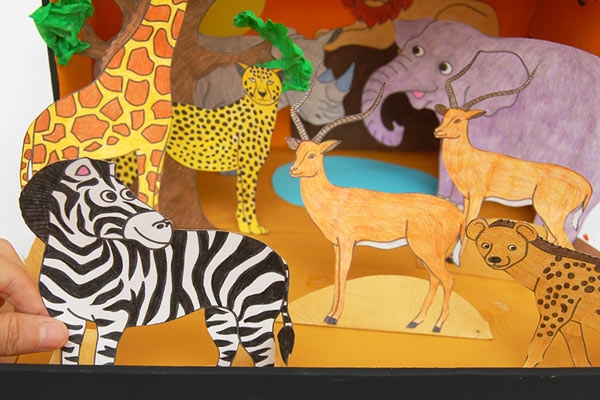
11Position the animals.
Position the animals inside your diorama. Glue the bottom tabs onto the ground and the side tabs onto the sides of the box.
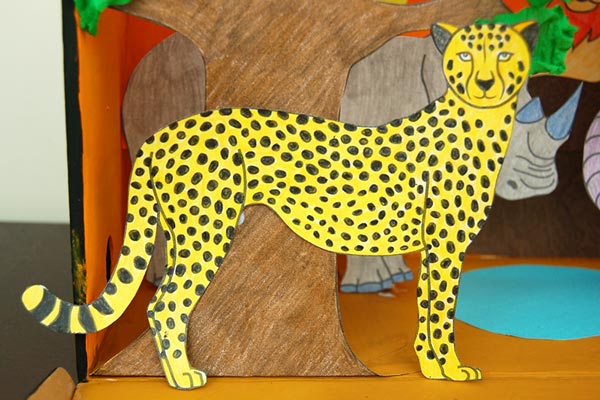
Some animals do not need any tabs since they can be glued directly onto the edges of the box or onto objects in the diorama. This cheetah, for instance, is glued onto the tree trunk.
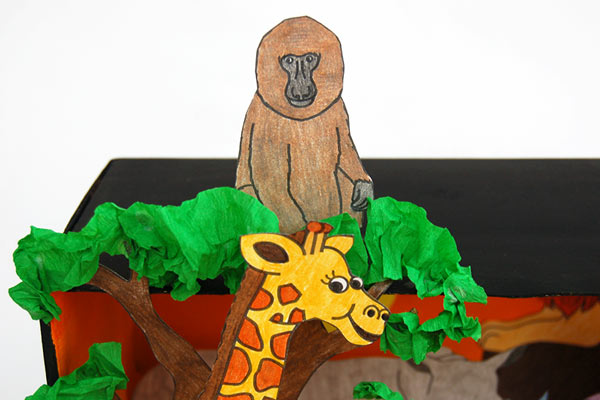
This babboon is glued on top of the box, nestled amongst the tree canopy.
12Create grass.
A savanna is not complete without grass. Create grass by cutting green, yellow, or brown paper into a rectangular piece. Cut blades of grass along one long edge of the paper.
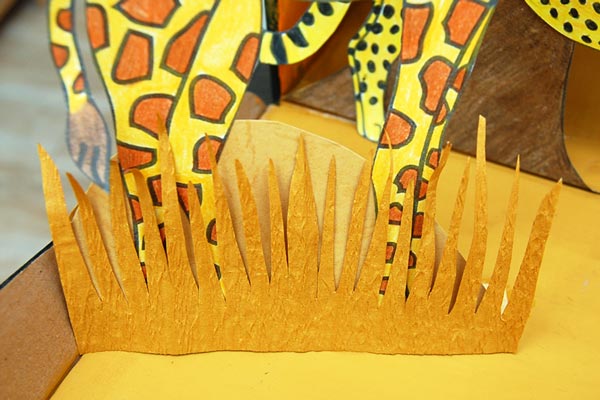
13Glue the grass.
Glue the strip of grass below the animal's legs or at the base of the tree.
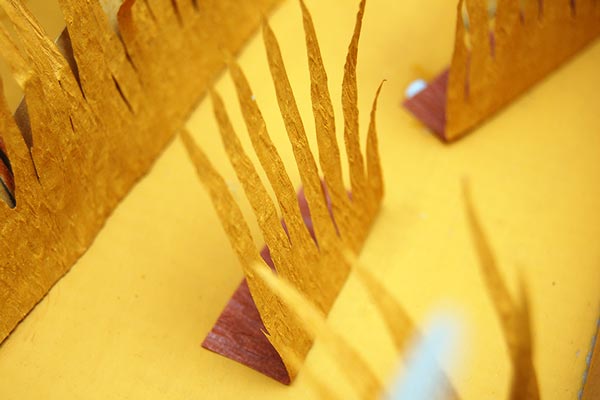
Create grass that can stand on its own by folding the strip of grass at the base to create a bottom tab. Glue the bottom tab onto the ground.
You Might Also Like
Comments
lindberghistithad.blogspot.com
Source: https://www.firstpalette.com/craft/african-savanna-diorama.html
0 Response to "how to draw african savanna trees"
Post a Comment